|
DIY Simple Quick Projects
Shopping
Social Media


Sometimes you might just need a "Project Fix". Well you are in the right place. These are all quick projects to get you thorough those times when you have more creativity than time. And you don't want to drag out the tool box.
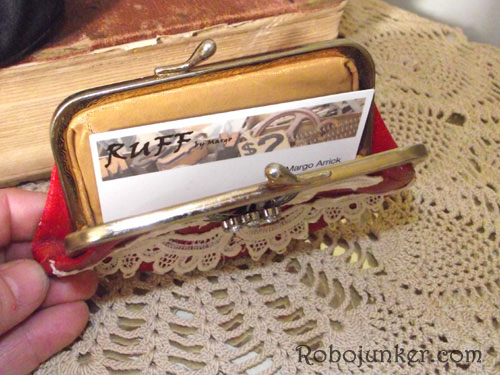
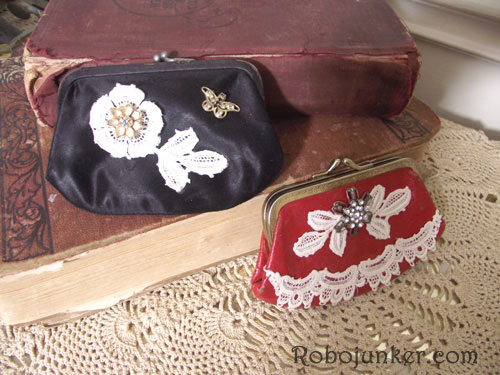 Old coin purses make great business card holders
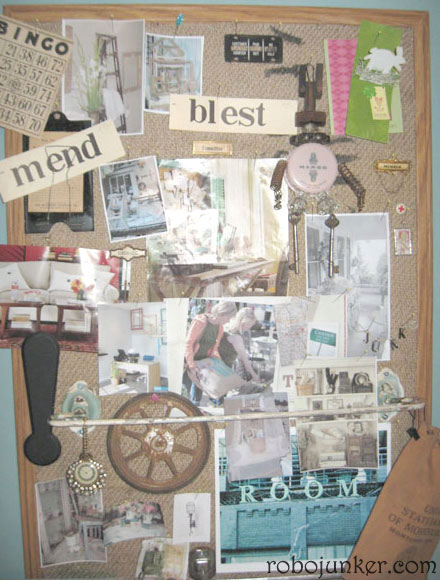
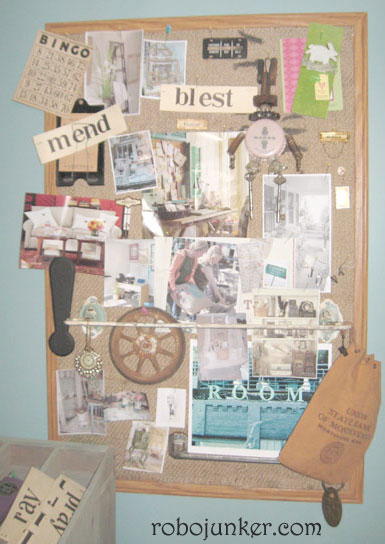
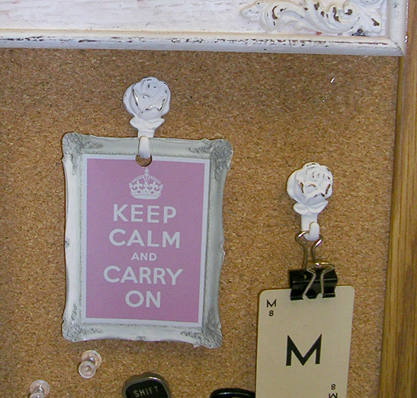
Burlap Covered Inspiration Board-By Margo Inspired by a bulletin board I saw in either Pottery Barn or Ballard Designs and one that was in an article in Flea Market Style Magazine, I decided to give an old cork board of mine a makeover. The cork on this board was messed up, because I had glued stuff to it and then removed it (along with some of the cork). So I covered it in burlap and made my very own inspiration board.
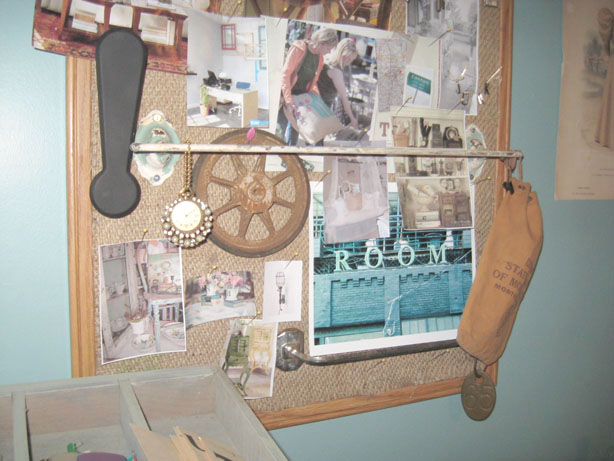
I added dimension by attaching 2 old towel bars to it. Now I can hang various trinkets as well as pin up clippings and ideas.
it's the perfect thing for my workroom
Memories and Ideas, I'm loving it.
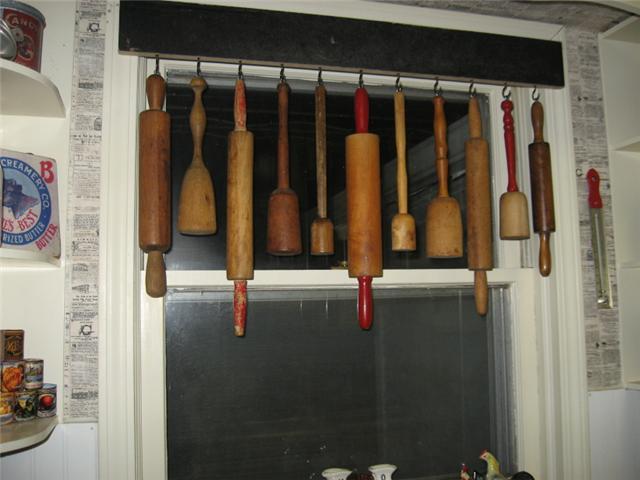
Fun Kitchen Valance by Carole
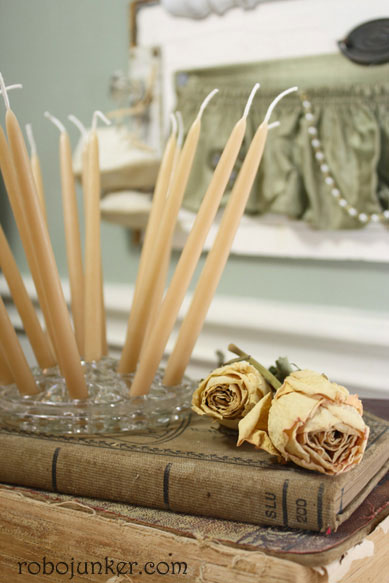
Thank you Carole for sharing this fun window topper idea, She writes: "I had a lot of extra rolling pins and mashers not being used so I decided to use them as a window treatment in my kitchen. I just used the mug hooks and eye screws to attach it on a board." Flower Frog Candle Holder-by Margo
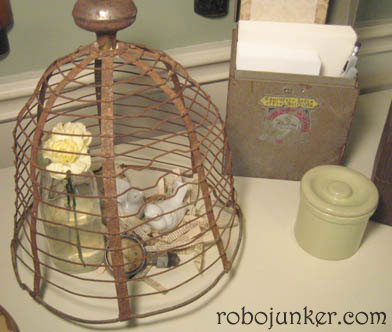
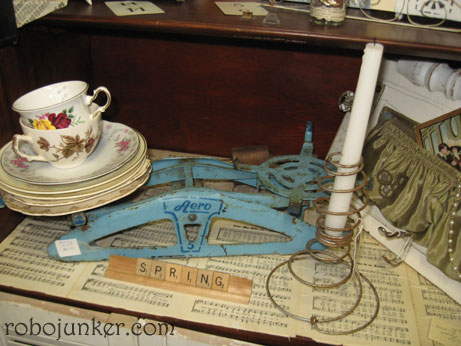
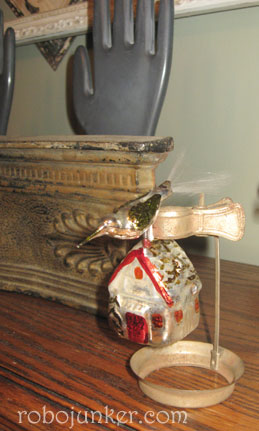
For this I simply added slim candles to an old glass flower frog. I wouldn't light them though without something fireproof to catch the drips. Metal Basket Cloche-by Margo
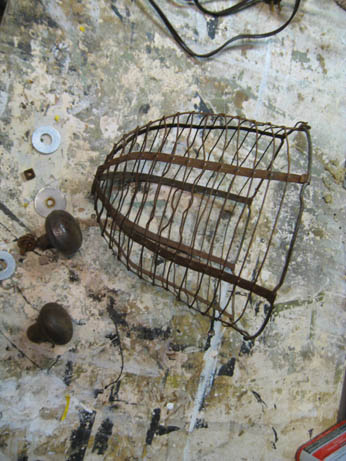
I purchased this metal basket thing at a flea market. The seller said it was an egg basket, but I think it was part of a horse muzzle.
I attached an old door knob to the top and had an instant cloche.
Catching some Sun by Margo
Candle Holder by Laurie This is a project I saw at the Junk Bonanza.
What qualifies as a quick project? First, this is where the Quick projects of the week go when they are no longer featured on the cover page. Second, I try to make them very easy with minimal use of tools. Hot Glue or Spray Paint may sometimes be required. Mail Bag Pillow/cushion by Margo
If you are ever lucky enough to find US mail canvas bags in good condition at a reasonable price, be sure to scoop them up. I was lucky enough yesterday to get 2 of these wonderful bags.
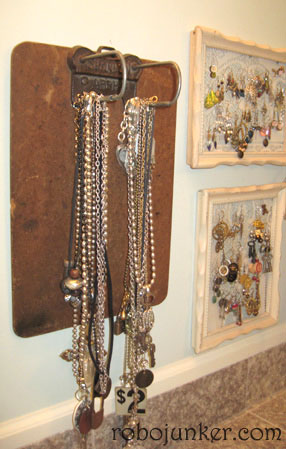
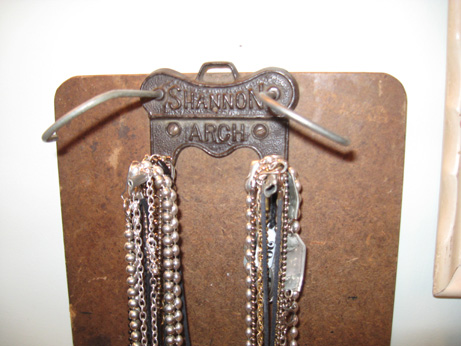
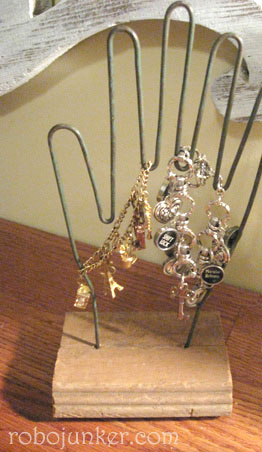
I knew immediately I wanted to turn them into pillows/ or cushions. First I washed them, I think one still needs a good soak in Vintage Textile Soak. 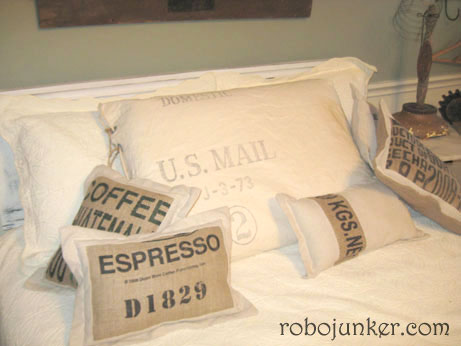 I wanted to do these cushions/pillows without cutting the bags up or destroying them in any way. So I took the smaller one, stuffed it with 2 standard pillows. Tied the end grommets with jute. Kept the original industrial lacing mechanism in tact, and that is it. I now have a unique pillow for the guest room. I think the other will be for my swing outside. 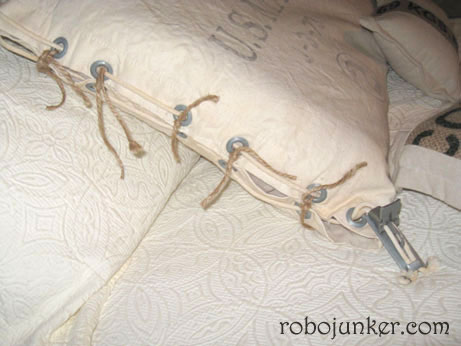 And when I'm tired of them, I can sell them in their original condition. Necklace organizer by Margo
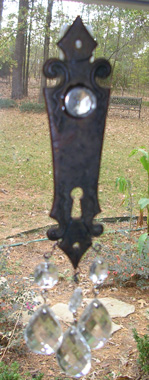
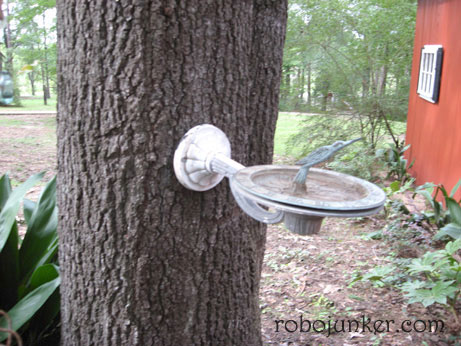
Ledge-by Margo
This is an old outdoor light fixture. I turned it upside-down and mounted it to a tree in my "junk yard". It could be a bird feeder, hold a plant, or as I'm using it here, to hold this sun dial (in the shade). Duhh! sun dials don't work in the shade, Margo!!! It could also be used indoors, mounted to a stud and used for anything from a catch all just inside the door, to a small side table ledge, next to a bed.  Escutcheon Necklace-by Margo 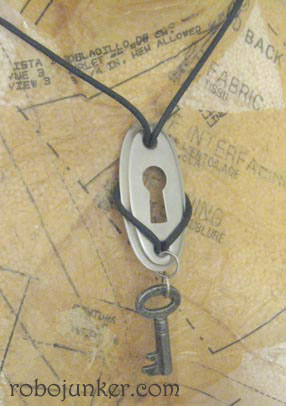 First fold the cord in half and add a bead, any bead will do, it will not be visible. You could even just tie a knot. 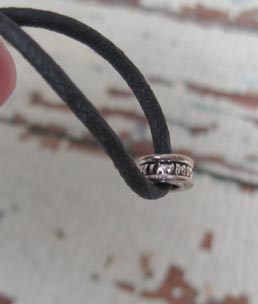 Then thread the cord through the lower hole on the escutcheon, the bead will keep the cord from pulling through. Ignore the key and jump rings you see here, you will add those later.  Then bring each side of the cord around the front, and then to the back behind the escutcheon 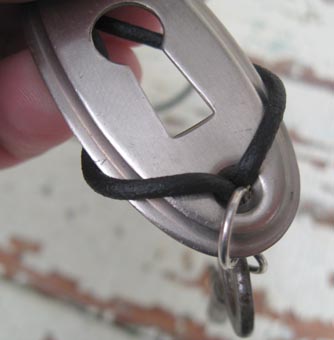 Bring the cord ends together again and thread through the top hole in the escutcheon plate to the front. As seen here from the back side.  using the jump rings, attach a key or any other item you want to dangle from below. Add a clasp of some sort and you are done. I just love this easy easy and unique necklace. It's great with jeans, and I love my jeans.  Hope you enjoy this easy project. I'm going to try to offer more projects in the future. If you found these instructions easy to follow, that is just a sample of what my tutorials are like. Most tutorials are a bit more detailed, with lots of pictures, and techniques. 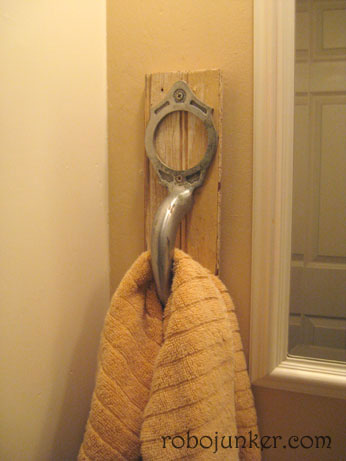 For this project, I simply took an old door handle with character. Screwed it to an old piece of trim board, and hung it on the wall.
Decopage Makeover
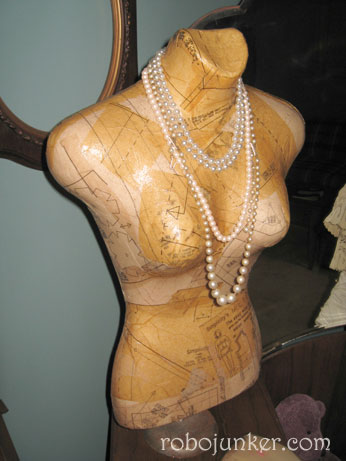
I found this styrofoam body form display recently at a junk shop. Chair Springs Momento Display - by Margo
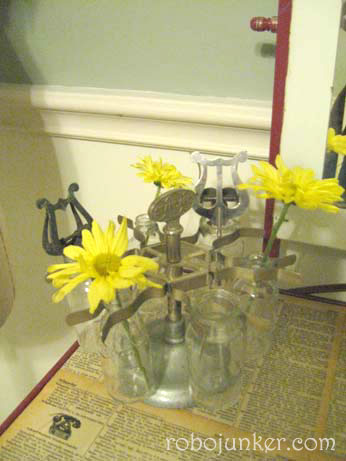
Rubber Stamp holder, bud vase, note holder-by Margo
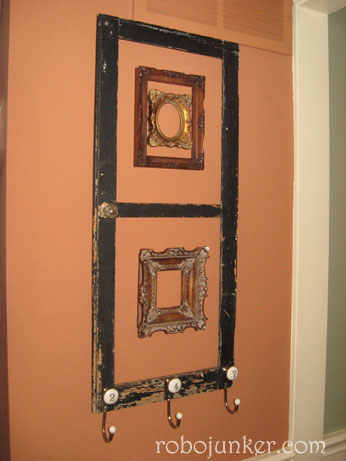
Fun with Frames-by Margo
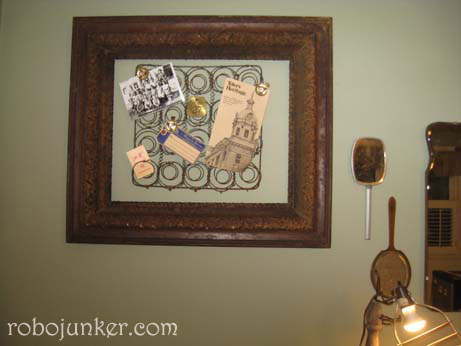
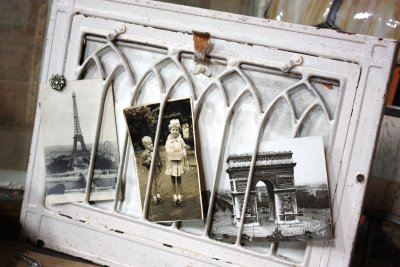
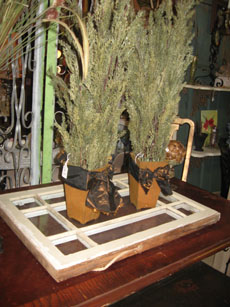
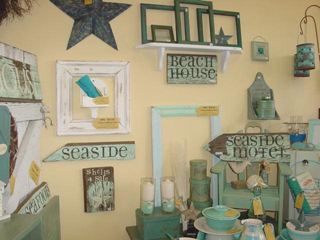
If you know me, you know that one of the things I always look for at garage sales is old wooden frames. I look for certain shapes, sizes and of course a great price. I'm always finding things to do with them and this is just one example. I had picked up this old glass-less windows and then I found the hooks with numbers on them. I attached the hooks, put a glass knob on the window frame and various small frames inside. It was a quick and easy project and I've received several compliments on it. So keep an eye out for those old frames.
Sap Bucket Wall Pocket, by Margo
Spring Lights, by Margo
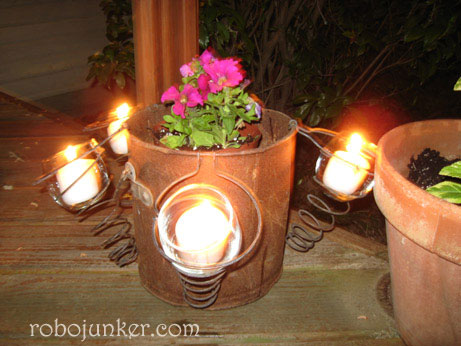
Old Bed Spring Candle Holder-by Margo:
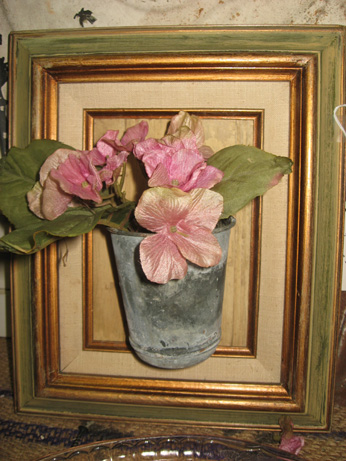
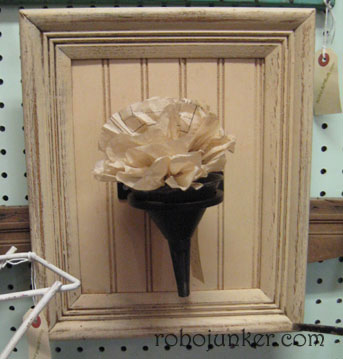
I found these unusually shaped springs in this bed that I took apart. They just screamed to be made into candle holders. Dimentional Wall Art/Pocket-By Margo
You all know I love to frame things and make unusual dimentional wall art. I found this metal ring at the Goodwill and knew exactly what I wanted to do. I had an old metal funnel that was just the right size. After simply screwing the metal ring onto the wood backing that I'd framed and painted out. I simply sat the funnel inside. Add a paper flower (or whatever you'd like). If you don't have a ring like I found, old Bed Springs would work too. Old Lamps
I've recently been inspired to use old lamps as display pieces for unusual items.
Here's one I did at Christmas Frame it up-by Margo
This is a fun way to display a collection, simply "frame it up" Shine a little light on the light-by Margo
Now this project takes a 20th century invention, backwards in time. I've taken this old electric light fixture, and turned it into a candle holder. I simply flipped it upside down. Glued a little rope around the edges of the socket to hold the candle in snug, and then inserted 2 candles. Easy as screwing in a light bulb. Flower Frogs as Pencil Holders-by Margo
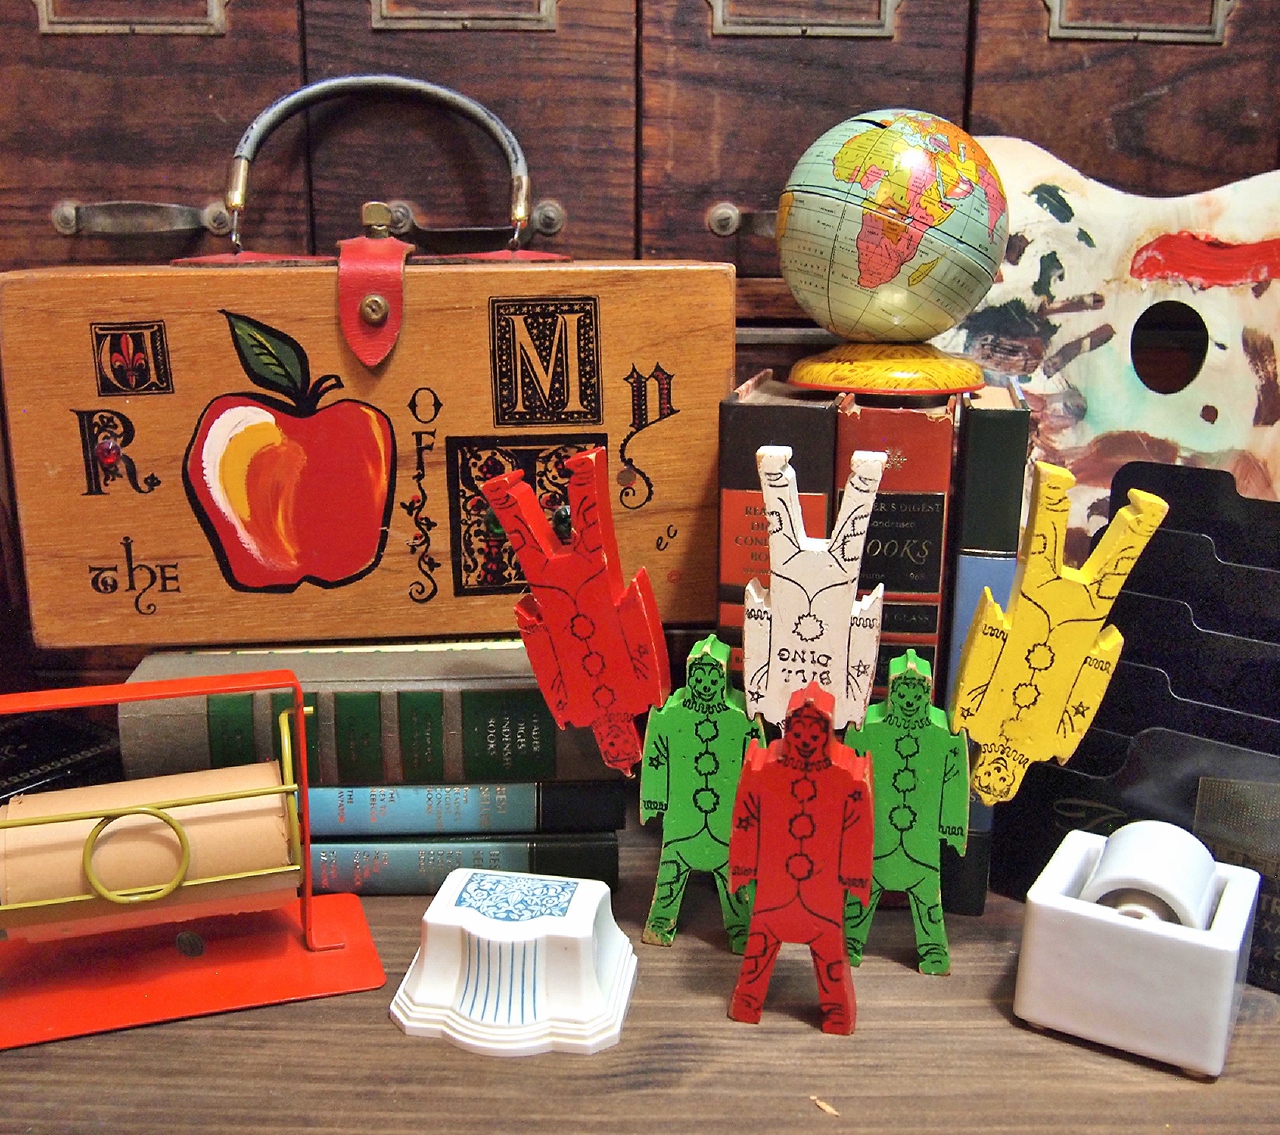
I just loved the shape of these old flower frogs, and they are perfect to hold pens and pencils, with style. Desk organizer-by Margo
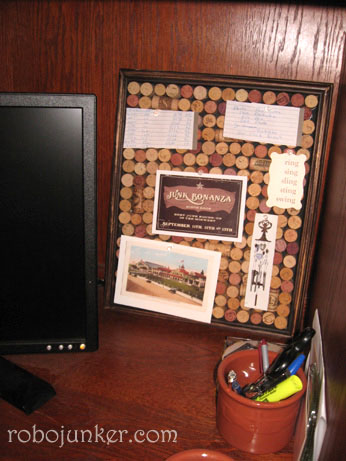
Bulletin Board from Corks - by Margo
for this project, I placed the corks end up, instead of horizonal. You could also do this by laying them all horizonal, which is the way it is usually done. I used wood glue to glue the corks in place, allowed it to dry. I use it as a unique bulletin board in my office.
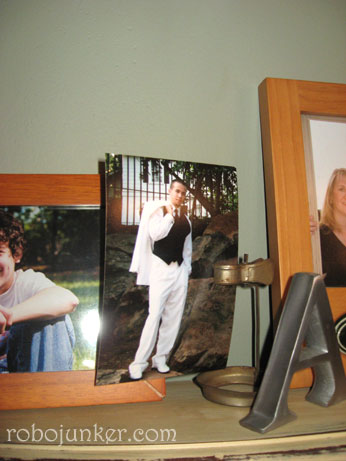
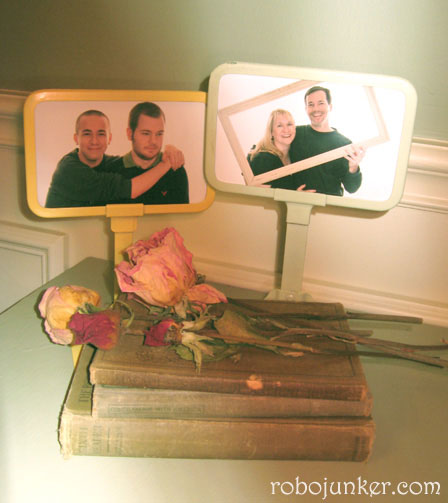
Photo display Idea-by Margo
Ok, I know I do lots of photo displays but I really like displaying my pictures, in unconventional ways.
I found these great clips, I think they have something to do with kerosene lamps. I simply clipped the photo in and there you have it.
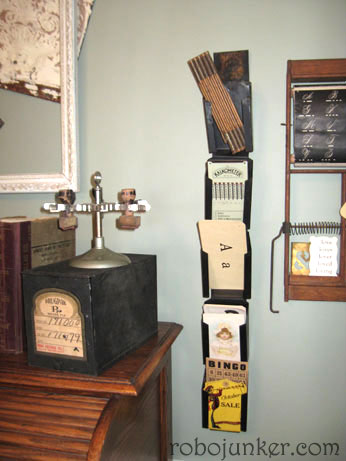
Various sorters-by Margo
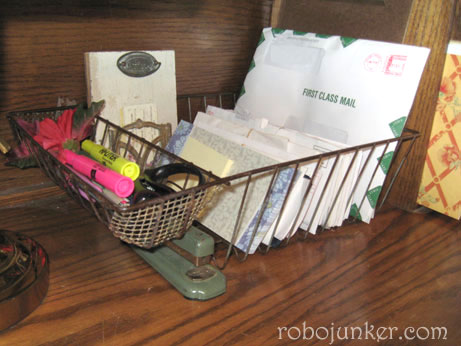
 Old Locker Baskets are a "must-have" for any junker. They have so many uses around the house. I liked this idea for using them in an office. Simply hang them on the wall, for files and papers. Easy to get to, easy to see, off the desk.
Note holder by Sonja This ia a easy to do project. I painted a metal lid, poked a hole in the top so the fork can slide through it. Put little berries inside (or what ever you desire). I use this to leave notes for my kids, hold recipe cards, or photos. Enjoy!
Junky Business Card Holder-By Margo
For this project, all I did was to screw some old drawer and door hardware onto an old piece of wood. Makes a great business card holder. Carriage Wheel Cameo by Margo
This was a pretty simple project. I took an old tricycle wheel, or carriage wheel. Glued an old cameo the the center and a doily folded in half underneath. Pretty ribbon finishes it off. You can dress up an old wheel with many different objects. This is just one idea. Have fun. Scary hand by Stacey
Stacey has used one of the glove forms in her scary Halloween display. What a fun display, thanks Stacey for sharing.
Suspended Bud Vase by Margo
This is a really easy project. First find an old photo frame that is on a stand. That will be the hardest part. Wrap wire around an old bottle, then extend the wire on both sides and wrap around the sides of the frame several times. Then use a pencil and curl the wire. Add pearls, or buttons to the bottle and your favorite flower. That's it. It's really hard to photograph and looks a lot better in person.
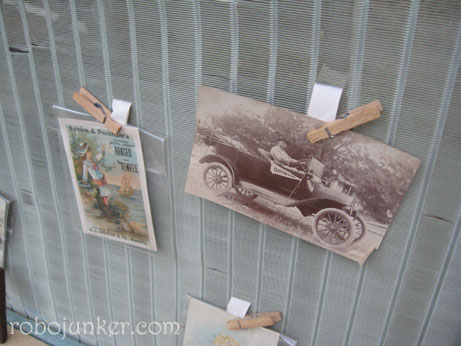
Screen Display board by Margo
I purchased this screen at the last Red Shed Sale. Valorie (Red Shed Girl) suggested this ribbon project to me. I simply took some ribbon, looped it through this unusual screen, stapled it at the back, and hung photo's and post cards from it. I also added a couple of shelves, but that is not necessary for this project. Thanks Val for the great idea.
Sign it-by Margo
For this "mail" sign, I simply took a metal garden marker that I had. Spray painted it with chalk board paint, and now I have a little sign I can tuck just about anywhere. Great for notes to kids, or as I've used it here to mark this basket as the place for the Mail.
Another Photo Holder by Margo
For this project, I just added a clamp to an old T-square I picked up at a garage sale. This would be great for photo's, post cards, notes etc.
Place Card Holder, Note or Photo Holder by Margo
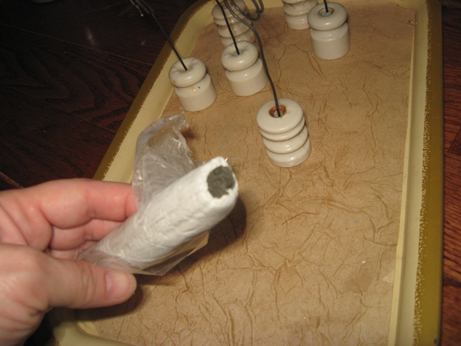
I got these old white insulators, and I knew what I wanted to make but was unsure of what product to use to acheive it.
I asked a friend, and she told me about this wonderful stuff.
It is found in the Plumbers Putty section of the hardware store. When you pull it out it looks like this
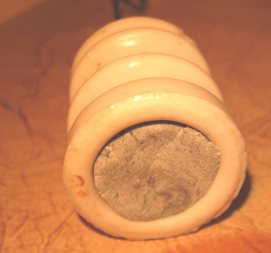
Cut or tear off as much as you think you need, and begin to roll it and knead it in your hands, until it is uniform in color, and gray. Then fill the larger hole at the bottom of the insulator. Use a knife to scrape off any excess so that it is flat. When it dries it will be as hard as a rock and it will be too late to do it then.
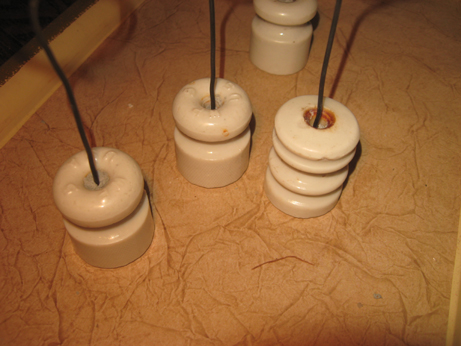
Then I made a very small snake out of more putty and placed it in the smaller end of the insulator, squeezing it down until I felt I had enough in there. Now I'm going to back up. Before you start doing any of this with the putty, you'll need to make your wire holders. I used heavy guage wire and wrapped it around a candle a couple of times. Then I made a strait portion to place inside the hole in the insulator.
Now back to playing with putty. Place the wire into the putty, it was thick enough for me that It stayed put while the putty hardened.
Let it set up for just a short while and you are done. Now you can use these as Place Card holders, Note holders or Photo holders.
Quick and easy as 1,2,3
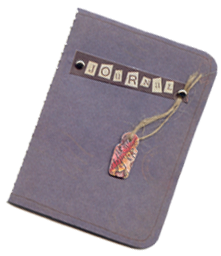
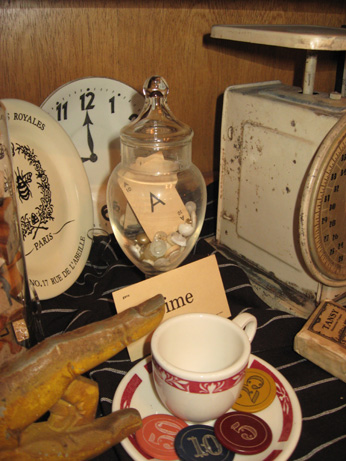
Bottled up by Margo I love apothocary jars, there are so many things you can do with them. I picked this up recently at an estate sale. It said "candy jar". But am I ever going to use something in the way it was intended? No of course not.
I put some white and cream buttons in the bottom, and placed some alphabet cards inside. The A is for my last name.
Quick and easy!!!!
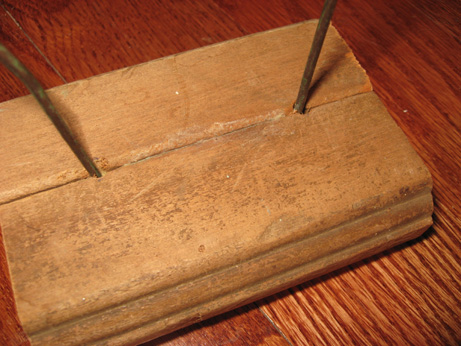
Gimme a Hand by Margo
I know what you are thinking, what the heck is it. Well I took an old glove stretcher made of wire and
I sandwiched it between 2 pieces of trim, and glued it together in a clamp overnight. That was about it.
the hardest part was to make the 2 pices of wood fit together evenly. I had to use a drill to make channels for
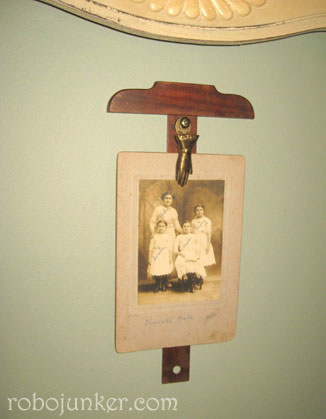
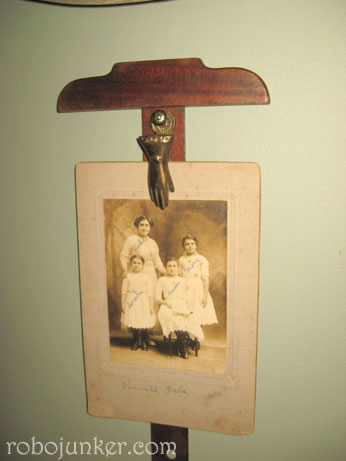
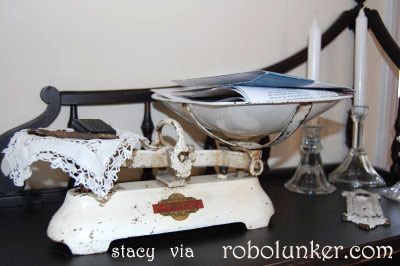
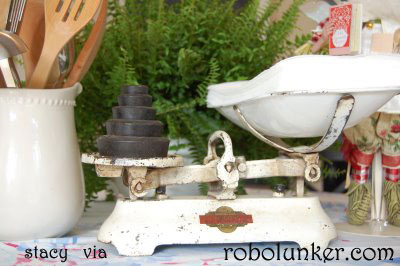
the wire. This group of projects was done by Stacy. Some fun ways to use an old scale. Thank you Stacy for the great projects.
This project was posted by Joy on her blog and she has graciously allowed me to use it as this week's Quick Project.
Isn't this a "grate" way to display photographs, Thanks Joy for such a "Grate" idea.
Tiptoe through the....mushrooms????? Fellow Blogger Stacey shares this great project.
Stacey's Blog here
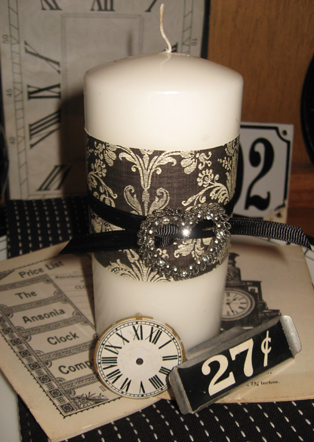
Dress up a candle This is a super easy project.
I took a regular pillar candle, Wrapped decorative paper around it, then a ribbon, then I added a piece of vintage jewelry. This is an easy dress up for a plain candle. Please remove the paper before burning :)
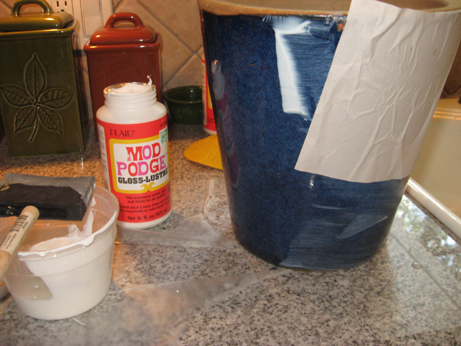
Dress up an old planter
After the pot is wrapped in the plain paper, then using the same technique, decopage your decorative tissue paper to it.

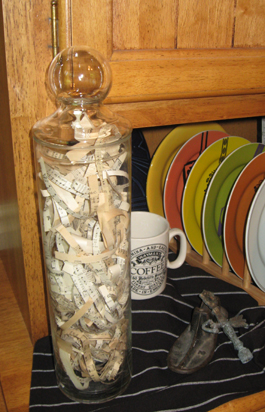 Take an old music book or hymnal, run some pages through a paper shredder and you've got great confetti. Use it inside glass bottles, as bird nests, in plants etc.
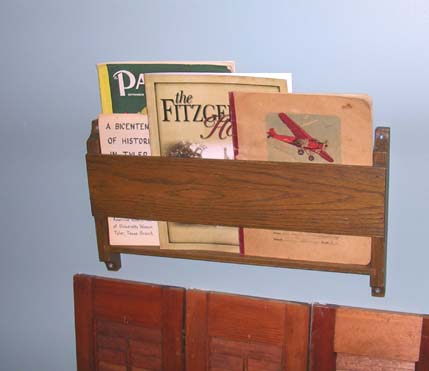
Old Window makes a great centerpiece
This old window is a great part of this centerpiece. This project was seen at Ye Old City Antique mall, Tyler Texas. Just hanging around
I love these old (or new) Person forms for Artists. I picked up this one at a Garage Sale, I like the way he looks just hanging out on my bookshelf.
Got Junk?
The smaller junk trinkets dress up old bottles beautifully. And who wants naked bottles? Test Tube, Stamp Holder bud vases
Simply find an old rubber stamp holder, and insert test tubes, fill with water and flowers and that is it. I'm also going to fill this one with little flags for the July 4th.
This project is nothing new to those of you in the "know", but I thought that someone out there might have never
seen it before. The difference here is that I've got mine tilted at an angle. To acheive this I simply hot-glude
the test tubes to the base before filling with water. As you know Hot-glue is not permanent and this is easily
un-done if you wish.
You could let the test tubes hang naturally as Joy has done in the picture below.
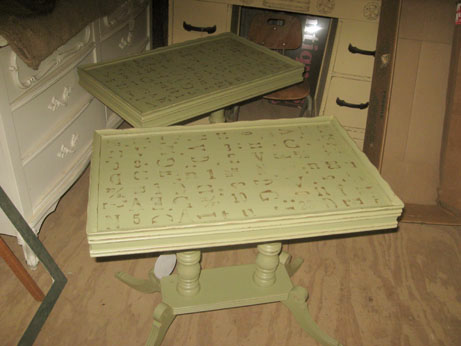
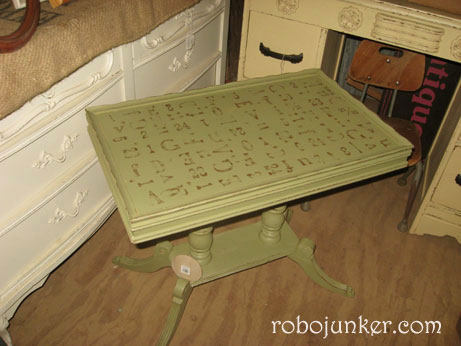
Stamp out a table
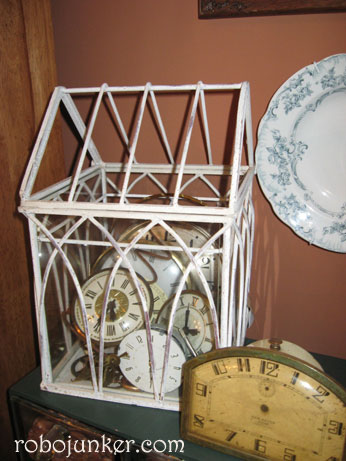
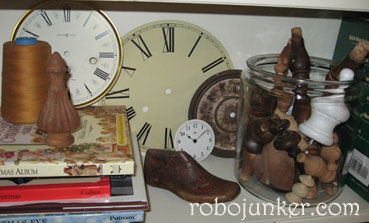
I had these 2 side tables that I had rescued, repaired, and painted, but I wanted to do something a little different. I saw a project on a blog that inspired me to do this. I took old letter press letters that I had and a regular craft stamp pad and stamped out this design on each one. You could use any stamps you want, this is just what I had. After the ink has dried, use a spray on laquer to protect it. Do not use the brush on kind, as this may smear the ink. I'm not quite finished with these 2 tables yet, I'm still trying to stabilize the legs, as you can see in the picture. Common Objects You've heard of Uncommon Objects, but I want to take a moment to talk about Common Objects. Those things found in every home, that can used in new and creative ways, to cheaply decorate and accessorize your space. I see a lot of this in the blog world, and you bloggers out there continue to inspire me with your arrangements. Here are a couple of examples... You've seen cloches, and conservatories with plants in them, but what about clocks????
This idea hit me one morning while I was getting ready for work. The clock faces were in an old gym wire basket, so I just moved them to this little conservatory I had removed from my booth. Then what to put in that gym basket???
Frames of course. Wooden frames are a favorite of mine to pick up at Garage Sales. These were in a box waiting for DH to give me his old ancestor photos for framing. Until that happens, they will reside here. Here is a glass jar filled with old finials waiting for future projects
That is just 3 examples of taking common objects and turning them into something beautiful, fun and different for your home.
Cake Plate
I had the base to a glass cake plate that had been broken. I finished breaking off the glass plate part, and then I attached an Old china dinnerplate to the top. There are many ways to do this, but I needed a transition piece, because the pedistal of the glass cake plate did not break off cleanly. I used a scrap piece of wood, drilled a hole, inserted the broken end of the pedistal into the hole and then glued the heck out of everything. This project could also be done with old wooden candlesticks that you find at garage sales.
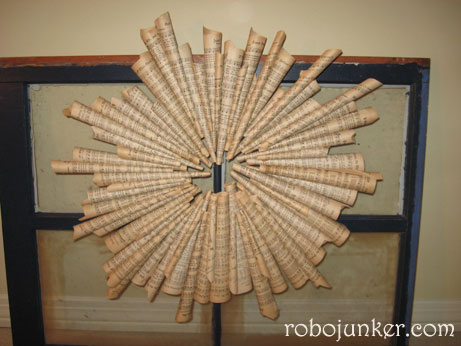
Hymnal Wreath
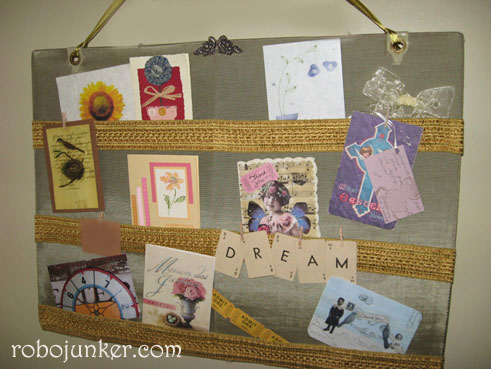
This project was inspired by something I saw on someone's blog. I took a wreath form that you can get at any craft store. Made a lot of cone shapes from an old hymnal, and hot glued them to the form. Adding, staggering, and arranging until I was happy. This is a great project to work on in front of the TV in the evening. Luggage divider, becomes memory board
I have lots of luggage parts around, and after removing pockets for a luggage pocket project, I found I had this lonely divider. When I looked at it it just screamed "memory board". I took some trim that I had picked up at a garage sale. I attached it by both sewing and gluing. Once the trim was attached it created a small pocket for tucking and clipping inspirations, cards, pictures etc. I hung it by a ribbon, through the grommet holes that were already there, and that was it.
Quick Photo Clip
Use old clip-on earrings to clip photos to a display board. The earrings could also be glued to
anything, like a screen, or old piece of wood etc, to make a place to clip photos, clippings, cards or whatever else.
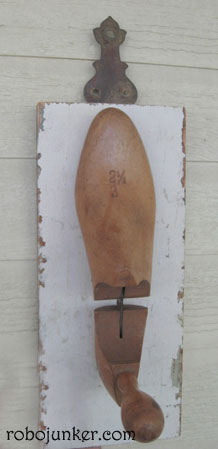
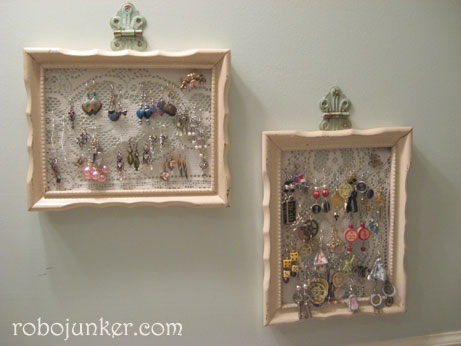
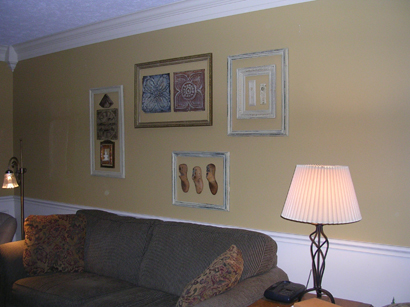
Use old hinges for all sorts of projects. Here I've added old hinges to a couple of frames and a "shoe stretcher wall hook" project, to add a little something extra. The one attached to the shoe stretcher is attached directly to the back and can be used to hang the item. The ones attached to my Earring Display frames, are simply attached to the wall and then the frames are hung to seem as if they are hung by the hinge.
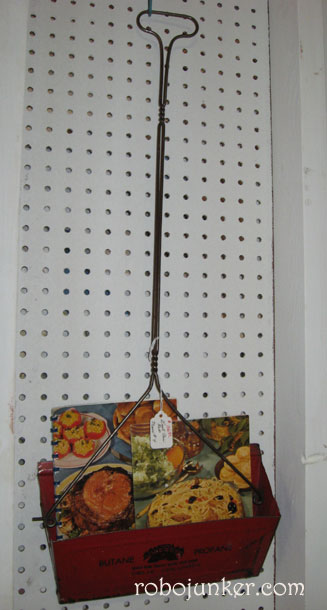
The Quick Project this week is from Syd Syd hung this old red dust pan from the wall, and uses it to display cards in her booth at Ye Old City Antique Mall.
So now all you've got to do is find a cute old dust pan like this and you've got yourself an instant wall pocket.
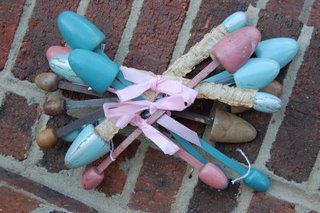
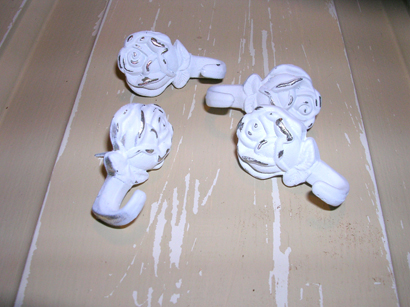
 First I have these great spring flowers made from faucet handles, this project has been a big hit on the message boards. Since I've posted it over there already, I thought I'd give you a bonus quick project 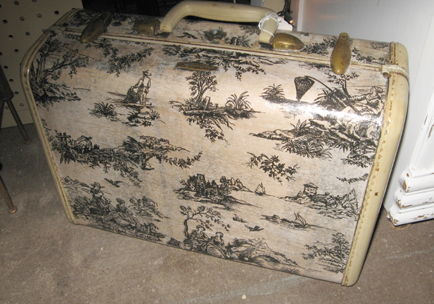 I had this small old piece of luggage. I removed the lining and pockets for other projects, and decided to decopage this decorative tissue paper to the outside to dress it up. I think it looks much better than it did before. Old Store Sign makes great photo display
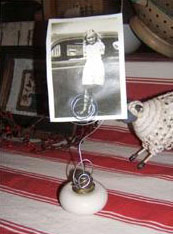 Jennifer shares this great quick project "It is a picture holder using an old doorknob and some wire I had lying around. I just pushed the wire through the knob and then twisted around and stuck a photo in it. I have always enjoyed doing crafty things but since I found your blog I have been trying to be better at using found goods for my crafts. I hope you like them.....jenn g
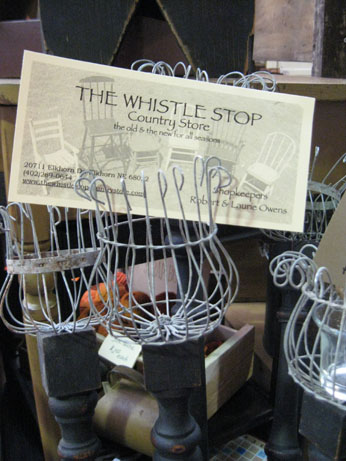
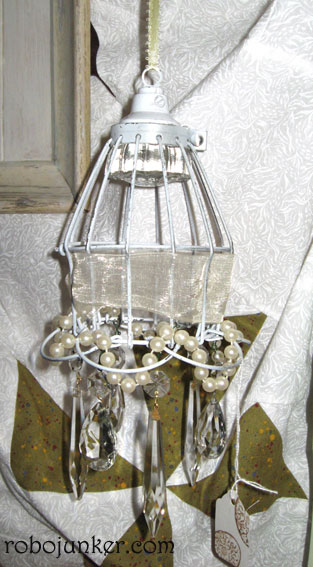
Romantic Chandie
I made this little Chandie out of an old wire, work lite cage. I painted it white, added a glass knob to the top, crystals and prisms, and pearls to the bottom and some sweet ribbon to finish it off. All you need is some hot glue, spray paint, and some floral wire. And of course a great wire lite cage ;) You're Just my Type
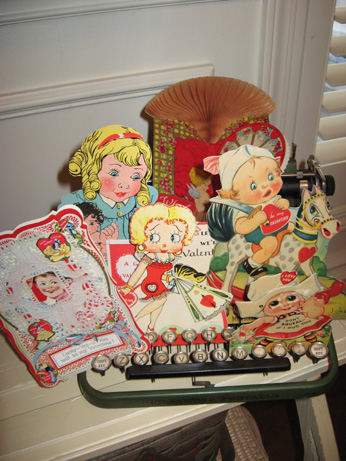
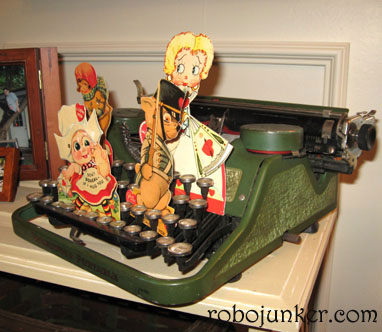
I love old Valentines, and here is a unique way to display them. I've used an old Typewriter (Family Heirloom) and just stood the valentines up between the keys for display. You could also use this idea to display photographs, cards, etc.
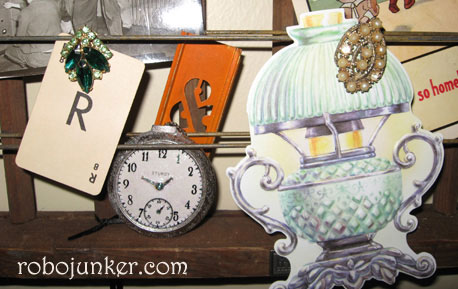
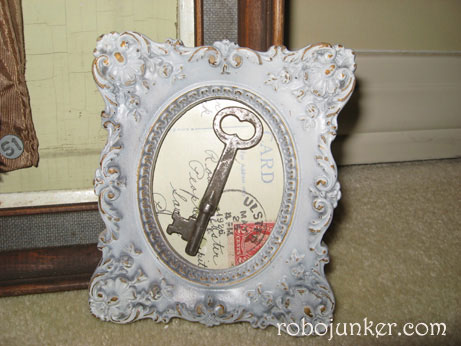
This Key has been Framed
For this project I simply took an old key, and a small wooden frame. to back it I copied (scanned) an old post card. Then I just glued the key to the postcard and then glued the whole thing behind the frame. Very simple project.
 In the winter when the hanging baskets are not as attractive try this idea.
I recently found these old scales at the flea market. By hanging them from a hook and then hanging something of interest below them, like a suncatcher or wind chimes, it can fill the empty space, till Spring. Old Chair Back becomes unique Frame. 
For this quick project, I found a unique chair back that had lost it's chair, and it's slats. I decided
to hang it on the wall and put this old ceiling tin inside of it.
Very quick project 
For this project I simply took an old child's chair that was missing it's seat. I attached some boards to the lower rungs, and
placed a potted plant inside. I chose to paint the boards to match the chair, but you could leave them natural if you wish.
This idea also works great for pet food. 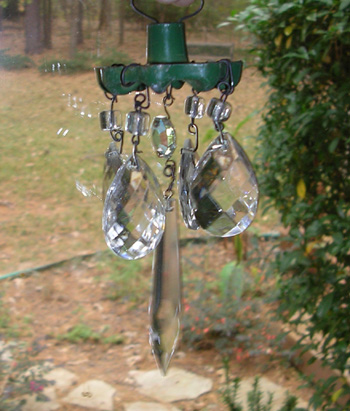
 To make this small garden chandies, just take a faucet handle and wire on some prisms. You can add a glass doorknob if you'd like.  My Friend Tina has this great dough bowl filled with crystal doorknobs and old keys. I love how it looks on her coffee table. What an easy project. Thanks Tina for the idea.
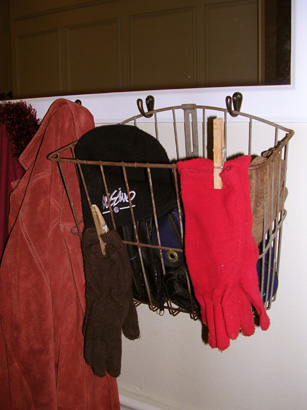
Things to do with an old bicycle basket
I found this bicycle basket recently at a garage sale for 25c. I can think of many things to do with it, and I thought I'd share them with you. It would be a great place to store files and stationary at the ready. Or what about gloves and hats by the door. It hangs perfectly on the hooks I have here. What about for mail, inside or out, or magazines in the bathroom. Lots of possibilities with this one.
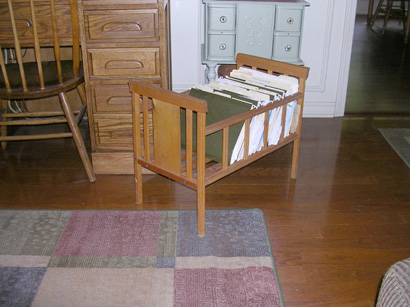
Turn an old doll crib into a place for files
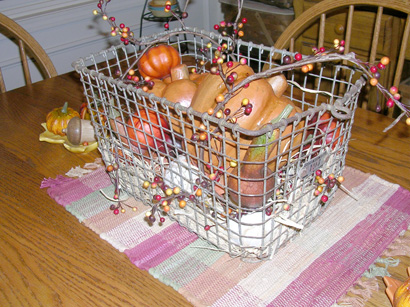
Table Centerpiece with old Locker Basket
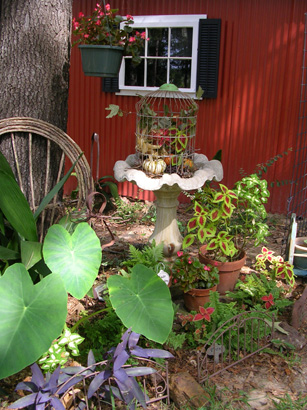
This is a great simple project, that can be modified for the Seasons. For Fall a nice rusty basket does the trick. Birdcage Still Life
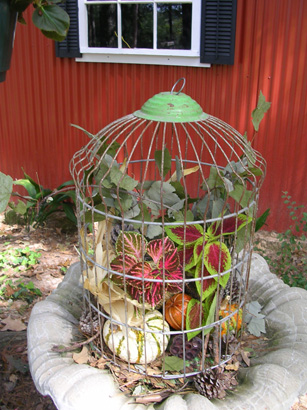
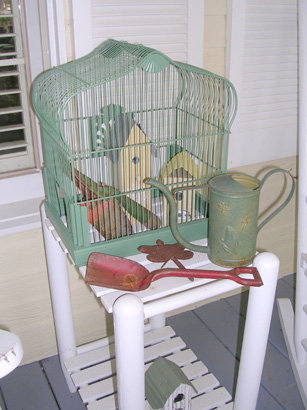
I am so excited about this week's quick project. All you need is a birdcage and a little imagination.
There are many things you can do with an old birdcage and below are several variations of one.
For this first cage, I simply gathered stuff from around the yard, threw in a few seasonal
gourds and I was done.
For this display, I spraypainted the birdcage and added Yard and Garden themed items
This is the same cage you saw above, but now I've added a chandie, and various found objects. When was the last time you saw a chandie in a birdcage???
Here are several that have been photographed at various Antique booth displays, thanks TC I love the flexibility of this project, now go find a birdcage and have some fun.
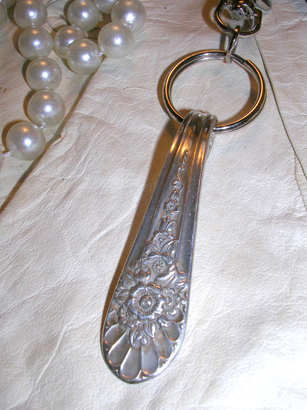
Old Flatware Key chain
For this project, you'll need an old piece of flatware (or new I guess). A pair of strong pliers, or preferably Channel Locks, and a vise. Place the flatware in the vice with the stem up and the spoon/fork side down, secure within the vice. Grab the stem and rock it back and forth until it breaks off. Discard spoon/fork part or save for future projects. Now take the widest part of the utensil and secure it in the vice. With your pliers proceed to bend the thinner part (skinny end) into a loop, as best as you can. This may take some practice. Once the loop is satisfactory, simply add a ring to the end, and you have a new keychain.
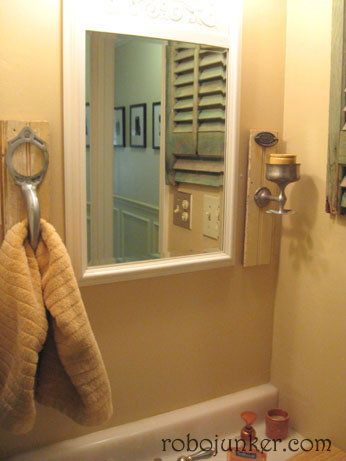
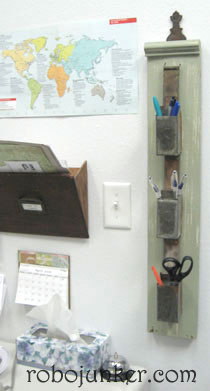
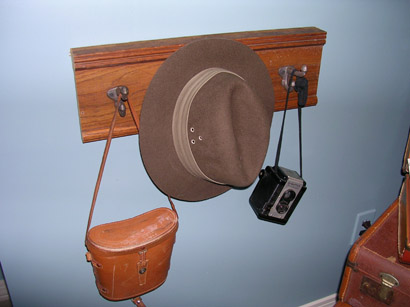 I made this coat/hat rack, simply by screwing some hooks into an old piece of bedrail. The bedrail is the side portions of an old bed that attached the headboard to the footboard. In this case it was a beautiful oak, and I don't have the footboard, so the side rails were un-useable.  I took an old sewing drawer, that was not in great condition. Added a wood applique to the front, from the hardware store. Painted the whole thing and now it would make a great display container for the bathroom, or photos, or anywhere in a cottage or shabby home.
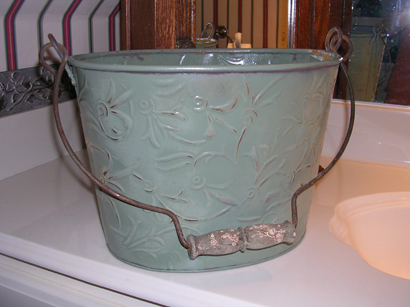
Ugly Duckling
We've all seen ugly, antiqued brass and metal things from the 70's & 80's at garage sales etc. Well next, time give those ugly metal things a second look. If they have a releaf pattern on them, imagine what they might look like painted, and then distressed. Each of the items above was, in it's former life, ugly. But with a can of spray paint, and a little sanding, I feel I've given them a second life and a pretty one at that. I hope you can see the beauty of these things if you run across them in future junking adventures.
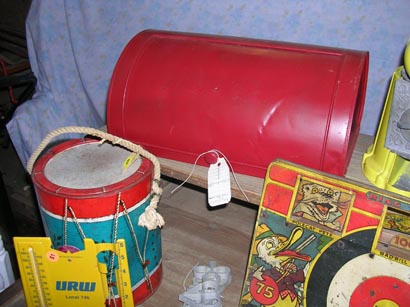
Turn an old bread box into a great office/desk organizer
With nothing but a can of spray paint you can turn old, unattractive metal bread boxes, into great desk organizers. Simply spray paint them, let them dry and you are done. As you can see by the red one. Spray painting the inside is a good idea too. Spring mail sorter
I took a large spring and simply nailed it to a piece of scrap wood. It makes a great mail sorter. You can find more Office Organization T2T projects on my Organization Page
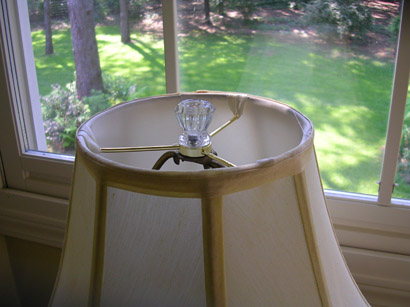
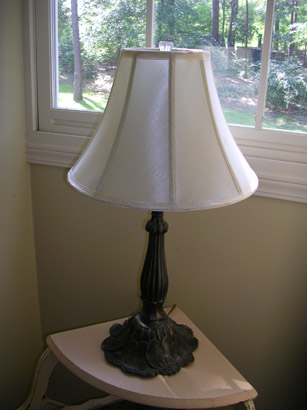
If you need a finial for a lamp and just don't have one, use an old glass knob. I just hot glued this one on to the part where the finial would screw in, and I've got a great cottage look.
from TTRBB- HGTV MB The birdhouses are just leftover pieces of fence post. I have a ton of those old home interiors brass wall hangings with flowers, butterflies and hummingbirds and I just clipped of some of the flowers. I used a flattened bottle cap on one of the "bird" holes and the other is the end from a canned biscuit container. I spray painted them flat black, sprinkled with cinnamon and sealed for the rusted look.
 Rosemary used old Corbels for this window topper, plate rail.
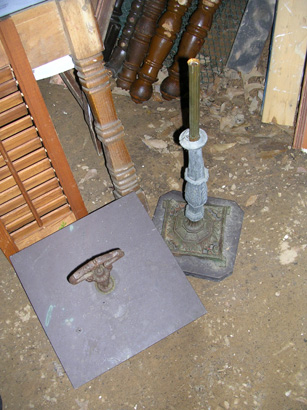
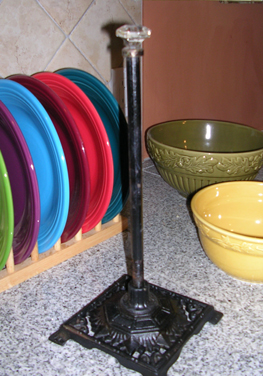
I called it the Lamp thingy. I was not sure what I was going to do with it, but it had such a great shape and weight I had to get it. I took it all apart, stared at it for awhile, and after a few weeks it finally came to me.
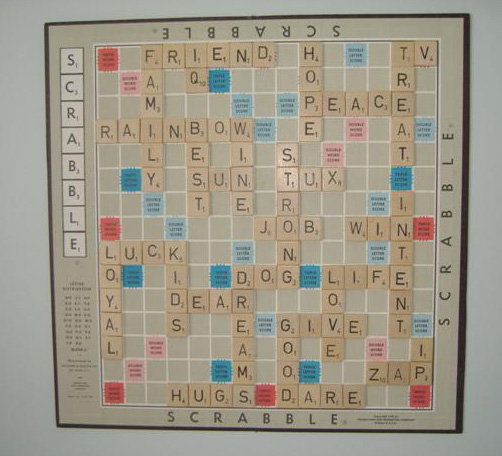
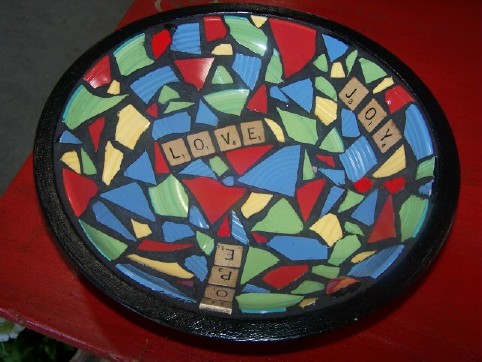
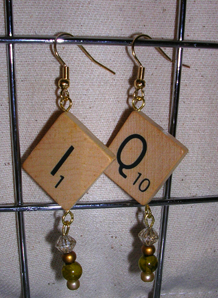
Scrabble tiles are great T2T accessories Below are just a few projects using old (or new) scrabble tiles.
Top to Bottom, Left to Right
Look for objects you have around your house to make Basket Tie-Ons. Ornaments wooden hearts, jewelry, or an iron star can all be used to dress up baskets for the season or for your mood. Think outside the box with Picture Frames
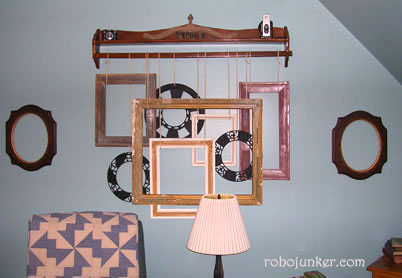
Wooden picture frames can be picked up at Garage Sales for a song. There are so many things you can do with picture frames. You don't just have to put a picture inside. Frames are a great way to display, Plates, Found Object, Books, groups of smaller framed photos, Post Cards, Coin Collections, etc. They also look great grouped by themselves with nothing inside. Above are just a few ideas, so keep an eye out for those frames, look for interesting details and shapes, and pick them up when you see them.
Top, Left to Right, Margo's Living room, Tina's Shabby White Display
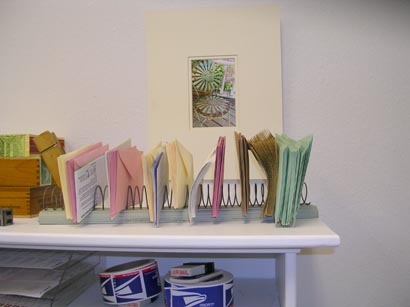
Take the hymnal holder from an old church pew and use it as a book holder. Mine is in my guest room, Tina uses hers in the bathroom. These also look nice painted for that cottage look. I've seen them used in kids rooms to hold thier story books. Have fun with this one.

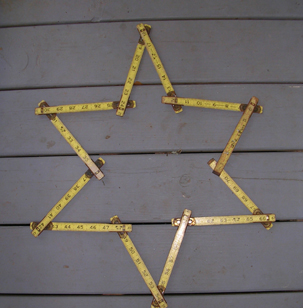 Just take a folding ruler and bend it until it makes a star, You might want to hot glue the 2 loose ends together. This is a really simple project. Although it would look great on it's own sitting on a shelf or above a cabinet, It would also be nice added to a wreath with a patriotic theme, or with flowers etc. Thanks Theresa for the inispiration.
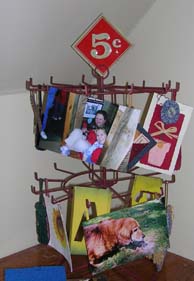
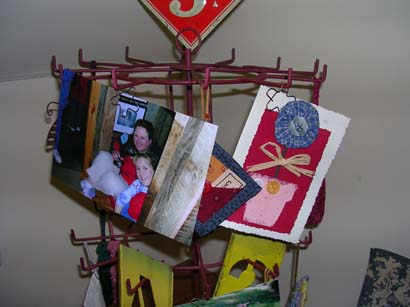
Look for old store displays to use in your home. I've used this one to display photos, and momentos. You could even use it for jewelry or ornaments during the Holidays. To hang the photo's I simply attached paperclips and then left the loop slightly above the picture, using it as a hook.

|